What This Guide Covers
This guide walks an administrator through setting up SharePoint Online as a file provider in the Display and Share Files module. Once configured, administrators and content editors can browse SharePoint document libraries and select files to display on your intranet pages.
Your instance of Azure/Entra may be different and options may be different, so some of these options/settings may be in different places.
If you have AI Search enabled for your site, these files will be included in the search results.
Before You Begin
You will need:
- Access to your organisation's Azure Portal with permission to register applications and grant admin consent
- The URL of the SharePoint site you want to connect (e.g.
https://contoso.sharepoint.com/sites/Marketing) - A MyHub portal administrator account to enter the credentials into the FileShare module
Step 1 — Register an Application in Microsoft Entra ID
- Sign in to https://entra.microsoft.com (Microsoft Entra admin center)
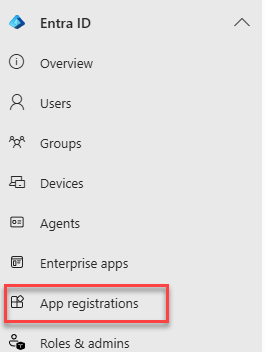
- In the left navigation, go to Entra ID > App registrations
- Click New registration
- Fill in the registration form:

-
- Name:
MyHub FileShare SharePoint(or any name that identifies this integration) - Supported account types: Select Accounts in this organizational directory only (Single tenant)
- Redirect URI: Leave blank — client credentials flow does not use a redirect
- Name:
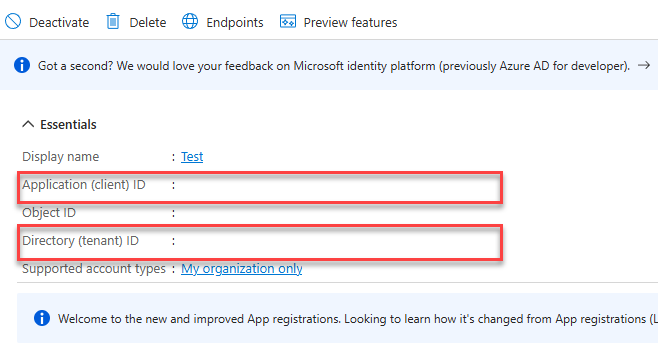
After registration, you will land on the app's Overview page. Note down the following, as you will need them later:
| Value | Where to find it |
|---|---|
| Application (client) ID | Shown on the Overview page — this is your clientId |
| Directory (tenant) ID | Shown on the Overview page — this is your tenantId |
Step 2 — Create a Client Secret
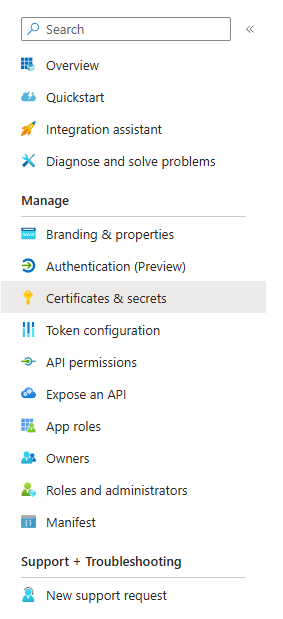
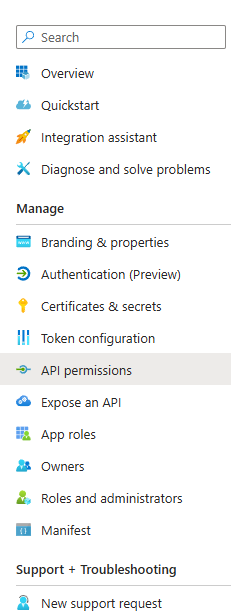
- In your app registration, select Certificates & secrets from the left menu
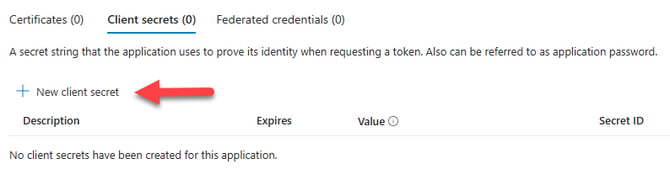
- Under the Client secrets tab, click New client secret
- Enter a Description (e.g.
MyHub FileShare) and choose an Expiry period. Please note the expiry period, with a reminder to create a new secret when it expires, as MyHub cannot see the secret or the expiry date. When it expires, you will need to create a new one and add it to your MyHub site. - Click Add
- Immediately copy the secret Value — this is your
clientSecret
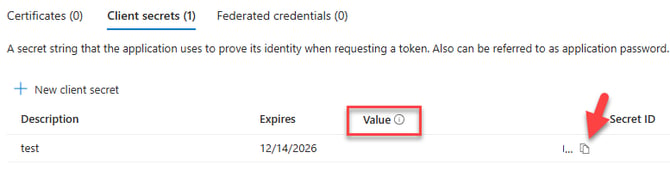
Important: The secret value is only shown once. If you navigate away without copying it, you must delete it and create a new one.
Step 3 — Grant API Permissions
- In your app registration, select API permissions from the left menu
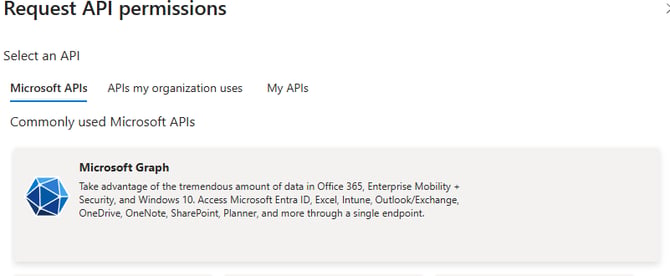
- Click Add a permission
- Select Microsoft Graph from the list of APIs
- Select Application permissions (not Delegated)
- Find and check Sites.Read.All

- This allows the app to read all SharePoint site collections via Microsoft Graph
- If your organisation requires shareable link creation, also add
Sites.ReadWrite.All
- Click Add permissions
- Click Grant admin consent for [Your Organisation]
- Confirm by clicking Yes
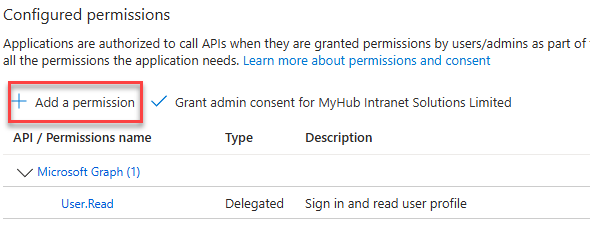

The Status column next to Sites.Read.All should now show a green tick marked Granted for [org].

Why Microsoft Graph, not the SharePoint API? The module makes all SharePoint calls through Microsoft Graph endpoints (
/sites/,/drives/,/items/). Permissions must be added under Microsoft Graph — adding them under the separate SharePoint API entry will not grant the access the module needs.Why admin consent is required:
Sites.Read.Allis an application permission. It grants access to all sites across the tenant without a specific user signing in. Only a tenant administrator can approve this.
Step 4 — Find Your SharePoint Site URL
Your site URL follows this format:
https://[tenant].sharepoint.com/sites/[sitename] Examples: - https://contoso.sharepoint.com/sites/Marketing - https://contoso.sharepoint.com/sites/IT - https://contoso.sharepoint.com (root site)
You can copy the URL directly from your browser when visiting the SharePoint site. Use only the site root — do not include any library or folder path.
Credentials to Enter in MyHub
Once the above steps are complete, enter the following values in the MyHub FileShare provider configuration (accessible from Site Settings - File Share Settings or the module's Change Source screen):
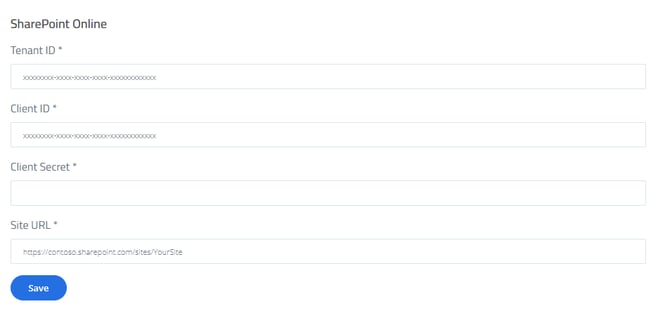
| Field in MyHub | Value |
|---|---|
| Tenant ID | Directory (tenant) ID from Step 1 |
| Client ID | Application (client) ID from Step 1 |
| Client Secret | Secret value from Step 2 |
| Site URL | Full SharePoint site URL from Step 4 |
Required Permissions Summary
| Permission | Type | Purpose |
|---|---|---|
Sites.Read.All |
Application | Browse document libraries and read file metadata |
Troubleshooting
Test connection fails with "Access denied" : Confirm admin consent was granted (Step 3). The status column in API permissions must show a green tick. - Confirm the permission type is Application (not Delegated).
Test connection fails with "Tenant not found" : Double-check the Tenant ID. It must be the Directory ID GUID from Microsoft Entra ID, not the tenant domain name.
Secret expired : Return to the app registration in the Microsoft Entra admin center, go to Certificates & secrets, delete the expired secret, create a new one, and update the clientSecret value in the FileShare module provider settings. Make a calendar reminder before the next expiry date.
"Sites.Read.All does not give access to a specific site" : This is expected — Sites.Read.All is a tenant-wide permission by design. If your security policy requires site-scoped access only, contact your SharePoint administrator about site-level app permissions.