
Embedding Excel, PowerPoint & Word Documents with Sharepoint Online
This guide will provide an overview of how to embed an Excel spreadsheet, PowerPoint, or Word document into your site. Once the document has been embedded any changes made in the source document will automatically be updated on your MyHub site.
While this guide will use the Text, Image, and Video module any module that has the text editing tool can be used to display a spreadsheet.
If you'd like some assistance with this we'd be happy to walk you through this on a call where we can walk you through the steps and do some screen sharing. Feel free to book a call with the support team by clicking here.
Set workbook permissions
Before you embed a document into your MyHub site, make sure it’s shared with all relevant people. For example, if you run a public blog, you'll want to share the workbook with everyone, including people who aren’t part of your organization. Here’s how you share a document:
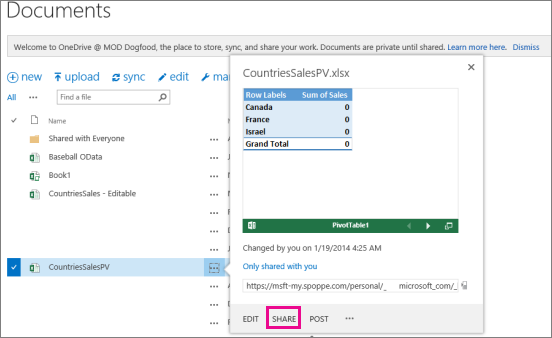
- In SharePoint Online, select the More menu (...) next to the workbook you want to share, and click Share.
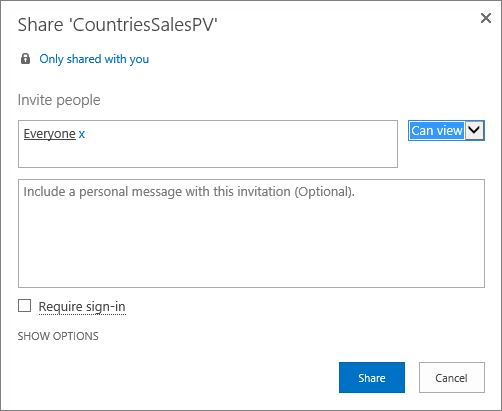
- In the Invite people box, select Everyone, and pick Can view.
Notes:
- It's possible that a SharePoint admin will block the option to invite Everyone to view a workbook. In that case, select Everyone except external users instead or consult with your IT/Sharepoint admin.
The Require Sign-in box should be unchecked regardless of the above selection for public anonymous access.
- It's possible that a SharePoint admin will block anonymous access by removing the Require Sign-in box and defaulting it to True. In that case, please consult with your IT/Sharepoint admin.
- You can't edit an embedded Excel for the web workbook, but people with the right permission may be able to open the embedded workbook in Excel, where they can edit the data.
- It's possible that a SharePoint admin will block the option to invite Everyone to view a workbook. In that case, select Everyone except external users instead or consult with your IT/Sharepoint admin.
- To enable sharing the workbook with guests, uncheck the Require sign-in box and click Share.
Get the URL to the public workbook
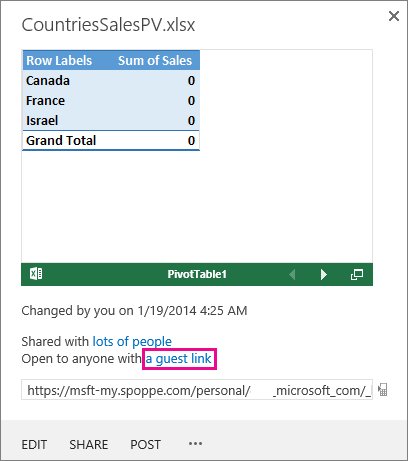
- Select the More menu (...) next to the workbook again and click a guest link.
- Select the guest link URL, copy it, and then paste it into Notepad.
- To enable the embedded workbook, change the URL as follows:
- To present the workbook as an embedded workbook, add the URL parameter &action=embedview at the end of the URL string.
- To allow interactivity with filters and Pivot tables in the workbook, add the URL parameter &wdAllowInteractivity=true.
- To have BI features such as Power View visualizations, PivotTables, and Data Model-based slicers work in the embedded workbook, add the string &wdbipreview=true.
Tips:
- The final URL should be similar to this one:
- https://host/personal/user/_layouts/15/guestaccess.aspx?guestaccesstoken=2UdAHGlFpWVaJjkI32xuisKCQsULG6M6b%2fIjG1LYpRM%3d&docid=166d02b42f5a1443781a1de428d9518ee&action=embedview&wdbipreview=true
Embedded workbook limits enforced by Microsoft
Feature |
Maximum Limit |
|---|---|
| Workbook size | 10 Mbytes |
| Number of concurrent viewers | 1000 |
Add Copied URL to Your Site
1. Once you've got your URL from the previous steps, you'll want to add this to a text, image, and video module. Once your module is on the page and you are in edit mode, click the pencil icon above the module and click Edit Content.
 2. Next, click the iFrame/PDF button shown in the image below.
 3. Paste the URL into the URL field and click Save.
 4. Save your changes by clicking the Save button at the bottom of the box.

If you'd like some assistance with this we'd be happy to walk you through this on a call where we can walk you through the steps and do some screen sharing. Feel free to book a call with the support team by clicking here.